Refresh Your Beeswax Wrap in 5 Minutes
You use them for everything, and it's starting to show. After a few months of uses and washes, your Ideal Wrap is probably starting to look a little... shabby. The wax might be cracking, rolling at the surface, or feel dry to the touch.
But don't worry! Restoring your wrap to prime condition is simple and only takes a few minutes of hands on time.
How to Refresh your Beeswax Wrap in 5 Minutes (using a hair dryer)
Step 1: Make sure your wrap is clean
Before you begin, you need to make sure our wrap is clean and dry. Rinse thoroughly under COLD water - the colder the better - and scrape away any dried gunk (avocado is the biggest culprit here).
Dry your wrap by patting it with a lint-free or low-lint towel (your oldest dish towel that's been washed to pieces is your wrap's best friend). New or fluffy dish towels will leave lint stuck to your wrap, and we don't want that! Air dry your wrap the rest of the way. This only takes a couple of minutes if you can put in somewhere with good air flow.
Step 2: Warm it up
Next, you'll want to lay your wrap out on a cookie sheet or thoroughly washed surface, and we're going to use a hair dryer to blast every square inch of our wrap. Don't go overboard, you don't want the wax to melt because it will melt right off, and onto the surface you just cleaned for this exercise. Melting the wax also mobilizes the dyes in the fabric, which can start to bleed. So don't do that.
Alternatively, if it's summer or warm where you live, you can leave your wrap sitting in the sun until it warms through. This is what I have done recently here in sunny Florida.
You could also simulate the warmth of the sun using your oven - but be careful to keep your oven at a relatively cool temperature, and to not leave your wrap in for too long. Most ovens won't have a setting for less than 200 degrees, so if you want to try this method, let your oven warm up, then turn it off before sticking your wrap (on a cookie sheet, and probably with a piece of freezer paper underneath) inside.
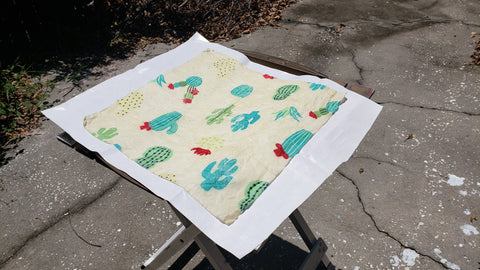
Extra Credit Step: If you want to spend a little extra time restoring your wrap, keep a large sheet of freezer paper handy to use as a surface to lay it out (you can reuse it over and over again). After warming your wrap, sandwich it between two waxy sides of freezer paper, and smooth and flatten it out with your hands.
Step 3: Cool it down
Finally, let it cool in place, before folding and storing. If you have your wrap between freezer paper or on a cookie sheet, popping it into the refrigerator is a great way to stiffen the wax before putting it away.
Good as new!
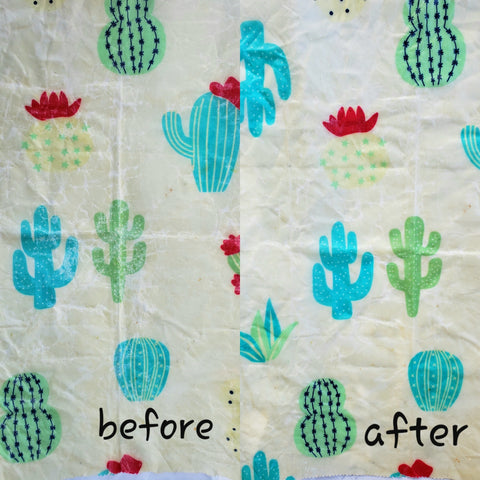
You can see in this before-and-after how the cracks are all sealed again and the wrap surface looks nearly new!
Have you tried refreshing your wrap?! How did it go? Let us know in the comments.
Click here to shop our collections now!
Interested in wholesale or private label? Email idealwrap1@gmail.com for pricing and information.